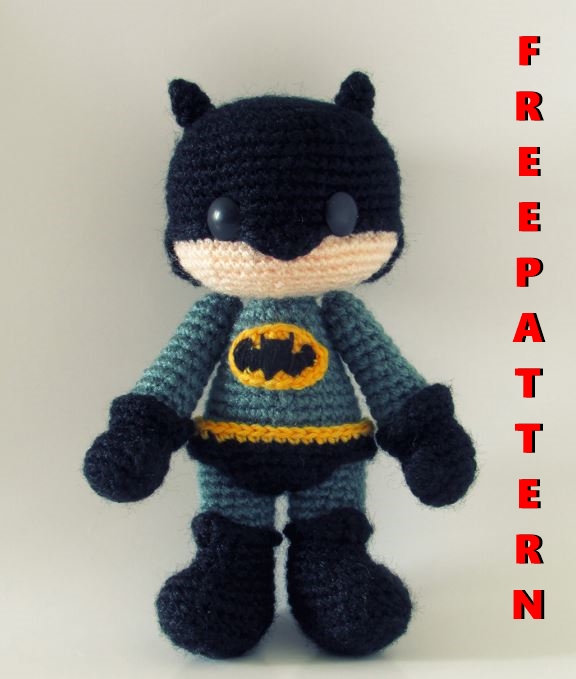
Batman Amigurumi Free Pattern
Hello dear visitors, I am here again with new amigurumi molds for you. I am sharing amigurumi patterns for you here for free. You can make your children happy by making these patterns. Amigurumi toys are very popular lately and are the most beautiful toys that don’t harm your kids. Your kids will love them. Let’s move on to our pattern and give them this gift.
Desinger : https://talesoftwistedfibers.wordpress.com/
This is an original pattern by Tales of Twisted Fibers
Materials:
sock weight yarn in black,
dark grey, yellow, light peach
embroidery thread or lace
weight yarn in black
2.5mm crochet hook
10mm safety eyes
fiber fill
yarn needle
Boot (make 2)
Round 1: With black yarn, ch 6. Starting from
second ch from hook, sc 4, 3 sc in the last ch.
Working on the underside of the foundation chain,
sc 3, 3 sc in the last ch. (13)
Round 2: sc 4, inc in the next 3 st, sc 3, inc in the
last 3 st. (19)
Round 3: sc 6, inc in the next 3 st, sc 7, inc in the
last 3 st. (25)
Round 4: Working in BLO, hdc around. (25)
Round 5-6: sc around. (25)
Round 7: sc 4, dec X 6, sc 9. (19)
Round 8: sc 3, dec X 4, sc 8. (15)
Round 9-10: sc around. (15)
Round 11: Using FLO, sc 3, hdc, dc, tr, dc, hdc, sc 7.
(15)
Slip stitch into the next st. FO and weave in ends.
Stuff.
LEG (make 2)
Fold the boot top outwards to reveal the back loops
of Round 11. Join dark grey yarn.
Round 1-6: sc around. (15)
FO. Stuff.
Follow Round 1-6 for the other leg but do not FO.
We will join the legs in the next round
BODY
Round 1: Hold both legs together. Make sure the
shoes face away from you. With the ‘working’ piece
on the right and the second leg on the left, find and
mark the stitch on the second (left) leg that would
be the middle of the left inner thigh. Insert hook in
this stitch and make an sc. Now sc in the remaining
14 stitches of the left leg. Next, sc in all 15 stitches
on the right leg. (30).
Round 2: inc in the first two st, sc 12, inc in the next
two st, sc 12, inc in the last two st. (36)
Round 3-5: sc around. (36)
Round 6: (sc 4, dec) X 6. (30)
Round 7-8: sc around. (30)
Round 9: (sc 3, dec) X 6. (24)
Round 10-13: sc around. (24)
Round 14: (sc 2, dec) X 6. (18)
Round 15: (sc 1, dec) X 6. (12)
FO. Weave in ends. Stuff.
UNDEROOS
Round 1: ch 36. Join to the first ch with a sl st. ch 1
and sc around. Join with a sl st, ch 1. (36)
From here, we will work in rows.
Row 1: dec, sc 6, dec, ch 1, turn. (8)
Row 2: dec, sc 4, dec, ch 1, turn. (6)
Row 3: dec, sc 2, dec, ch 1, turn. (4)
Row 4: dec X 2, ch 1, turn. (2)
Row 5-6: sc 2, ch 1, turn. (2)
Row 7: inc X 2, ch 1, turn. (4)
Row 8: inc, sc 2, inc, ch 1, turn. (6)
Row 9: inc, sc 4, inc, ch 1, turn. (8)
Row 10: inc, sc 6, inc. (10)
FO, leaving a long tail.
To make the waistband: Join yellow yarn on Round
1 and sc around. FO. Weave in ends.
Finishing up: Slip the piece up the legs. Position the
top half of the ‘hourglass’ on the front of the body
(Figure 1). Push the lower half of the piece through
the legs to the back, and with a yarn needle and
black yarn sew it to the waistband (Figure 2).
GLOVE (make 2)
Round 1: With black yarn, 6 sc in a magic ring. (6)
Round 2: Inc in all 6 st. (12)
Round 3: (sc 1, inc) X 6. (18)
Round 4: sc around. (18)
Round 5: cluster stitch*, sc 17. (18)
*If you are unfamiliar with this stitch, see the
section on How to make a Cluster Stitch.
Round 6: (sc 1, dec) X 6. (12)
Round 7: sc around. (12)
Round 8: Using FLO, (sc 1, inc) X 6. (18)
Round 9: sc around. (18)
FO. Weave in ends.
HOW TO MAKE A
Cluster Stitch
YO, insert hook in the next st, YO, draw up a loop,
YO, pull through the first two loops on your hook.
YO, insert hook in the same st, YO, draw up a loop, YO, pull through only the first two loops*. Repeatto ** 2 more times. YO and pull yarn through all 5
loops on your hook to close the cluster.
ARM (make 2)
Fold the glove outwards to reveal the back loops of
Round 8. Join dark grey yarn.
Round 1-5: sc around. (12)
Stuff glove.
Round 6: (sc 2, dec) X 3. (9)
Round 7-11: sc around. (9)
Stuff arm.
Round 12: dec X 4, sc. (5).
FO, leaving a long tail. With a yarn needle, weave
the tail through the front loops of all remaining
5 st and pull it tight to close. Weave in ends and
attach arms to the body
HEAD
Round 1: With black yarn, 8 sc in a magic ring. (8)
Round 2: Inc in all 8 st. (16)
Round 3: (sc 1, inc) X 8. (24)
Round 4: (sc 2, inc) X 8. (32)
Round 5: (sc 3, inc) X 8. (40)
Round 6: (sc 4, inc) X 8. (48)
Round 7: (sc 5, inc) X 8. (56)
Round 8-14: sc around. (56)
Round 15: sl st in the next 26 st, working in FLO
(hdc, dc, tr, dc, hdc), sl st in the remaining 25 st.
Round 16: In this round, we will work on the visible
loops of Round 14 on the wrong side of the head.
Join light peach in one of the visible loops and sc
around. (56)
Round 17-18: sc around. (56)
Round 19: (sc 5, dec) X 8. (48)
Round 20: (sc 4, dec) X 8. (40)
Round 21: (sc 3, dec) X 8. (32)
Round 22: (sc 2, dec) X 8. (24)
Round 23: dec X 12. (12)
FO, leaving a long tail.
Stuff head.
Now we work on the remaining section of the mask.
Mark the center of the head at the back on the last
round worked in black (Figure 3). Count 12 st from
this point to the left and mark the last st. Count 12
st from the center to the right and mark the last st.
Now we will work on these 25 st (including the st
marked as the center) to complete the remaining
section of the mask.
With the neck opening facing away from you, join
black yarn on the st marked on the right (Figure 4).
Row 1-4: sc across, ch 1, turn. (25)
Row 5: sc across.
FO, leaving a long tail. Sew flap to head.
EYE
Insert eyes on either side of the nose, making sure
the eyes stay within the last round of the mask.
EAR (make 2)
Round 1: With black yarn, 3 sc in a magic ring. (3)
Round 2: inc in all 3 st. (6)
Round 3-4: sc around. (6)
FO, leaving a long tail. Sew ears between Round 5
and 7, aligning them with the eyes.
LOGO
OVAL FRAME
Round 1: With yellow yarn, ch 6. Starting from
second ch from the hook, sc 4, 3 sc in the last ch.
Working on the underside of the foundation chain,
sc 3, 2 sc in the last ch. (12)
Round 2: inc in the next st, sc 3, inc in the next 3 st,
sc 3, inc in the last 2 st. sl st to join to the first st. (18)
FO, leaving a long tail.
BAT LOGO
With embroidery thread or lace weight yarn in
black, create an outline of the Batman logo (you
can search online for a sample). Fill it in with
straight stitches. Sew the logo patch on the chest.
Finally, sew the head to the body.
Your little hero is now ready to fight crime.