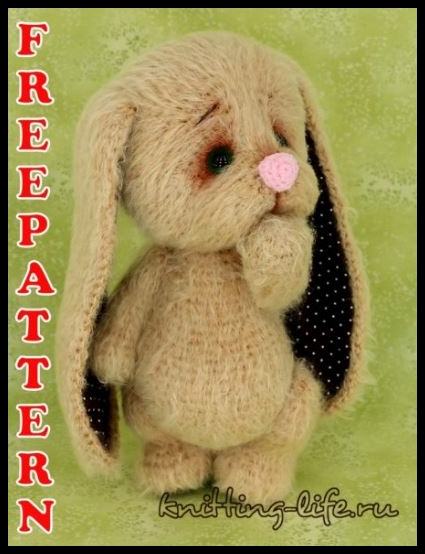
Amigurumi Bunny Free Crochet Pattern
Abbreviations:
Sc – single crochet,
inc – increase,
Dec – decrease
Hdc – half crochet
CH – chain
Stage 1. Upper and lower paws.
Upper paws:
The beginning row marker in this part can not be aligned.
1 row: 2 ch, in the first loop 6 sc (6)
2 row: inc x 6 (12)
3 row: (inc, 3 sc) x 3 (15)
4-5 rows (2 rows): 15 sc (15)
6 row: 6 sc, dec x 2, 5 sc (13)
7 row: 6 sc, dec, 5 sc (12)
8-17 rows (10 rows): 12 sc (12)
Fill the foot with filler. We retreat 2 rows down and insert a cotter pin with a disk (so that the decreases of 6-7 rows look in turn). I have a disk with a diameter of 15 mm.
________________________________________
Note: in order for the paws to fit snugly to the body, you need to choose the right diameter of the disk – it should be equal to the width of the paws in the place of attachment. Do not stuff the upper part of the foot too much, it should be flat – then the limbs will look like an extension of the body, and not separate, unrelated parts.
________________________________________
18 row: dec x 6 (6)
We fix the thread, cut it, hide the tip. We knit the second foot in the same way. Note that you should get the right and left paws.
Lower paws:
The beginning marker of the row runs through the middle of the heel.
1 row: 5 ch, from the second loop from the hook: inc, 2 sc, 4 sc to the first loop, on the other side of the chain: 2 sc, inc (12)
2 row: inc x 2, 2 sc, inc x 4, 2 sc, inc x 2 (20)
3 row: 2 sc, inc, (4 sc, inc) x 3, 2 sc (24)
You can immediately circle the sole on the paper to cut a heel cloth from it.
4-6 rows (3 rows): 24 sc (24)
7 row: sc, dec, 3 sc, dec, sc, dec, 2 sc, dec, sc, dec, 3 sc, dec, sc (18)
8 row: 6 sc, dec x 3, 6 sc (15)
9-10 rows (2 rows): 15 sc (15)
11 row: 7 sc, inc, 7 sc (16)
12 row: 7 sc, inc x 2, 7 sc (18)
13-14 rows (2 rows): 18 sc (18)
15 row: 7 sc, dec x 2, 7 sc (16)
16 row: 7 sc, dec, 7 sc (15)
We retreat 2 rows down, 3 loops from the marker right (for the left foot) or left (for the right foot) and insert the cotter pin with the disc (I have 22 mm). Fill the foot with filler.
17 row: (sc, dec) x 5 (10)
18 row: dec x 5 (5)
We fix the thread, cut it, hide the tip. We knit the second foot in the same way.
2 stage. Body:
The marker of the beginning of the row runs in the middle of the back.
1 row: 2 ch, in the first loop 6 sc (6)
2 row: inc x 6 (12)
3 row: (inc, sc) x 6 (18)
4 row: sc, inc, (2 sc, inc) x 5, sc (24)
5 row: (3 sc, inc) x 6 (30)
6 row: 2 sc, inc, (4 sc, inc) x 5, 2 sc (36)
7 row: (5 sc, inc) x 6 (42)
8-13 rows (6 rows): 42 sc (42)
14 row: 16 sc, dec, (2 sc, dec) x 2, 16 sc (39)
15 row: 39 sc (39)
16 row: 16 sc, dec, (sc, dec) x 2, 15 sc (36)
17 row: 36 sc (36)
We insert the cotter pins of the lower legs between the 7th and 8th rows, 8-9 loops to the left and to the right of the marker, twist.
18 row: 2 sc, dec, (4 sc, dec) x 5, 2 sc (30)
19-20 rows (2 rows): 30 sc (30)
21 row: (3 sc, dec) x 6 (24)
22-23 rows (2 rows): 24 sc (24)
24 row: sc, dec, (2 sc, dec) x 5, sc (18)
25-26 rows (2 rows): 18 sc (18)
We fill the tummy with filler, you can pour a little glass granulate. We retreat 4 rows down, 6 loops from the marker to the left and right – insert the cotter pins of the upper legs, twist. We fill the body with filler to the end.
27 row: (sc, dec) x 6 (12)
We insert a cotter pin with a disk for attaching the head (I have 18 mm).
28 row: dec x 6 (6)
We fix the thread, cut it, hide the tip.
3 stage. Head
The marker at the beginning of the row runs in the middle of the chin.
1 row: 2 ch, in the first loop 6 sc (6)
2 row: (3 sc in one) x 2, 2 sc, (3 sc in one) x 2 (14)
3 row: sl-st, sc, 3 sc in one, inc x 2, 4 sc, inc x 2, 3 sc in one, sc, sl-st (22)
4 row: sl-st, 3 sc, inc x 3, 3 sc, inc x 2, 3 sc, inc x 3, 3 sc, sl-st (30)
5-6 rows (2 rows): sl-st, 28 sc, sl-st (30)
7-8 rows (2 rows): 30 sc (30)
9 row: 7 sc, (inc, sc) x 4, (sc, inc) x 4, 7 sc (38)
10 row: 8 sc, (inc, 2 sc) x 3, inc, 2 sc, inc, (2 sc, inc) x 3, 8 sc (46)
11 row: 13 sc, (inc, 3 sc) x 2, inc, 2 sc, inc, (3 sc, inc) x 2, 13 sc (52)
12 row: 19 sc, inc, 4 sc, inc, 2 sc, inc, 4 sc, inc, 19 sc (56)
13 row: 25 sc, inc, 4 sc, inc, 25 sc (58)
14-19 rows (6 rows): 58 sc (58)
20 row: 6 sc, dec, 13 sc, dec, 12 sc, dec, 13 sc, dec, 6 sc (54)
21 row: 54 sc (54)
22 row: (7 sc, dec) x 6 (48)
23 row: 48 sc (48)
24 row: 3 sc, dec, (6 sc, dec) x 5, 3 sc (42)
25 row: (5 sc, dec) x 6 (36)
26 row: 2 sc, dec, (4 sc, dec) x 5, 2 sc (30)
27 row: (3 sc, dec) x 6 (24)
We insert the body cotter pin between the 14th and 15th rows, on the line of the marker, we twist. We fill the head with filler.
28 row: sc, dec, (2 sc, dec) x 5, sc (18)
29 row: (sc, dec) x 6 (12)
We fill up to the end.
30 row: dec x 6 (6)
We fix the thread, cut it off.
4th stage. Ears, nose, tail, design.
Ears:
The beginning row marker in this part can not be aligned.
1 row: 33 ch, from the second loop from the hook: inc, 10 sc, 10 hdc, 10 dc, 6 dc to the first loop, on the other side of the chain: 10 dc, 10 hdc, 10 sc, inc (70)
2 row: 3 sc in one, 10 sc, 10 hdc, 11 dc, İncdc x 6, 11 dc, 10 hdc, 10 sc, 3 sc in one (80)
3 row: sc, 3 sc in one, 10 sc, 10 hdc, 12 dc, (İncdc, dc) x 6, 12 dc, 10 hdc, 10 sc, 3 sc in one, sc (90)
4 row: 2 sc, 3 sc in one, 84 sc, 3 sc in one, 2 sc (94)
We cut the thread, fix it. We knit the second eye in the same way.
Spout:
The beginning row marker in this part can not be aligned.
1 row: 2 ch, in the first loop 6 sc (6)
2 row: (3 sc in one, sc) x 3 (12)
3 row: sc, (inc, 3 sc) x 2, inc, 2 sc (15)
4 row: sc, (dec, 3 sc) x 2, dec, 2 sc (12)
Cut the thread, leaving a small tip for sewing.
Tail:
The beginning row marker in this part can not be aligned.
1 row: 2 ch, in the first loop 6 sc (6)
2 row: (inc, sc) x 3 (9)
3 row: 9 sc (9)
We cut the thread, fix it.
Decor:
On the muzzle of a bunny, we outline the points of the eyelets and the mouth. Insert the needle into the point of tightening the mouth and bring to the point of the right eye. We retreat the column, insert the needle, withdraw at the point of the mouth, tighten. Repeat the tightening several times, pulling the thread. Similarly, we tighten the left eye, at the end we tie the thread to a strong knot.
We fasten the eyes, sew the nose (we stuff it a little with the filler), embroider the eyebrows and mouth. You can tint a little mouth and around the eye.
We transfer the contour of the eye to the fabric and cut out two parts (they should be the same size as the ears, or a little larger). In the same way, we cut out two parts for the heels.
We sew the cut out details with a secret seam, bending the excess fabric inside.
Sew on the ears in any position you like.
Sew the tail, comb the bunny.
That’s all, our bunny is ready! If you wish, you can dress the bunny in a warm sweater, hat or tie a scarf to it, so that even in the worst frosts the bunny would not be cold