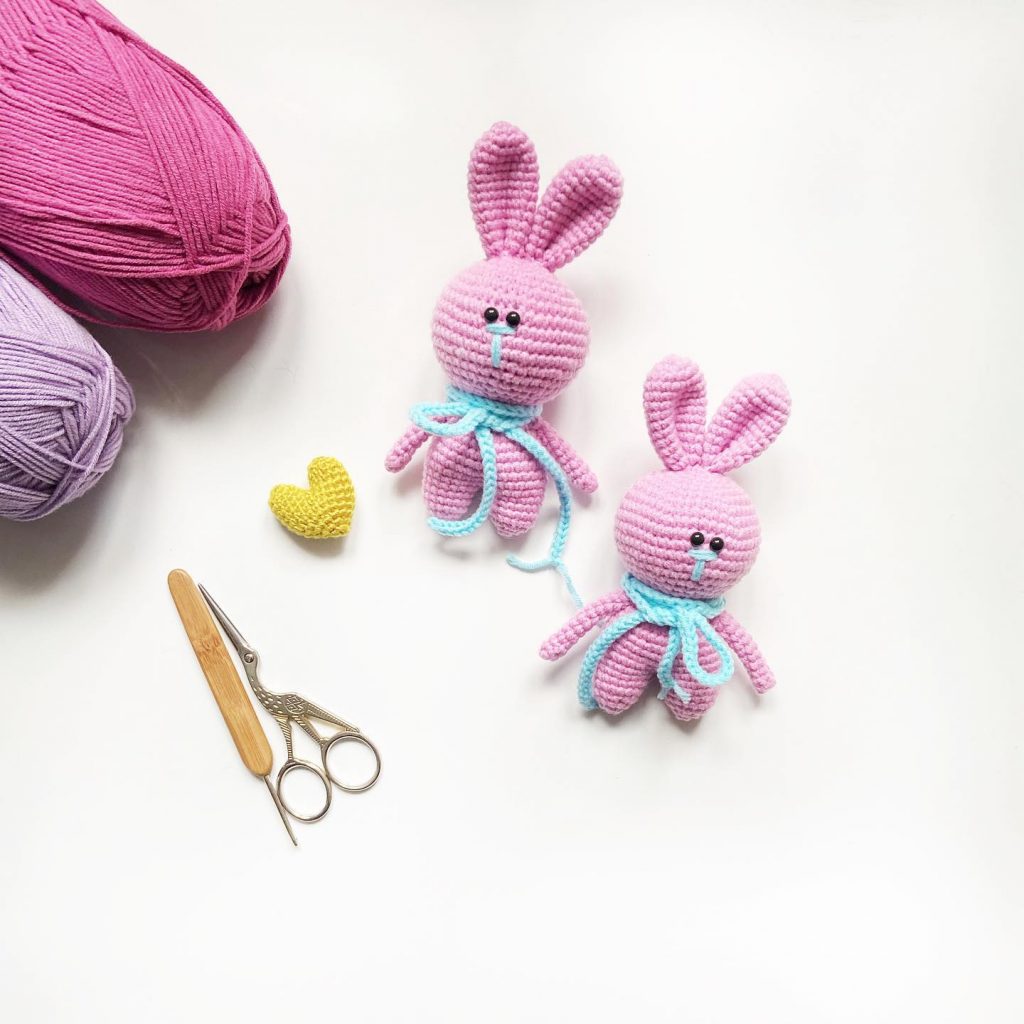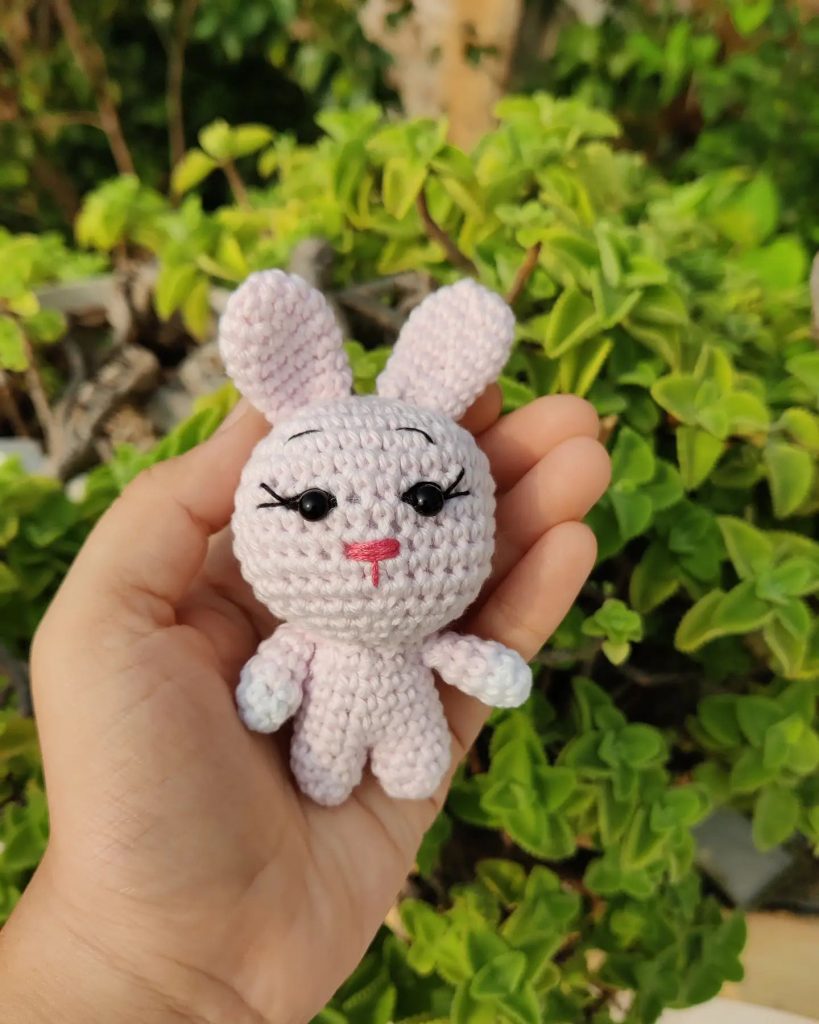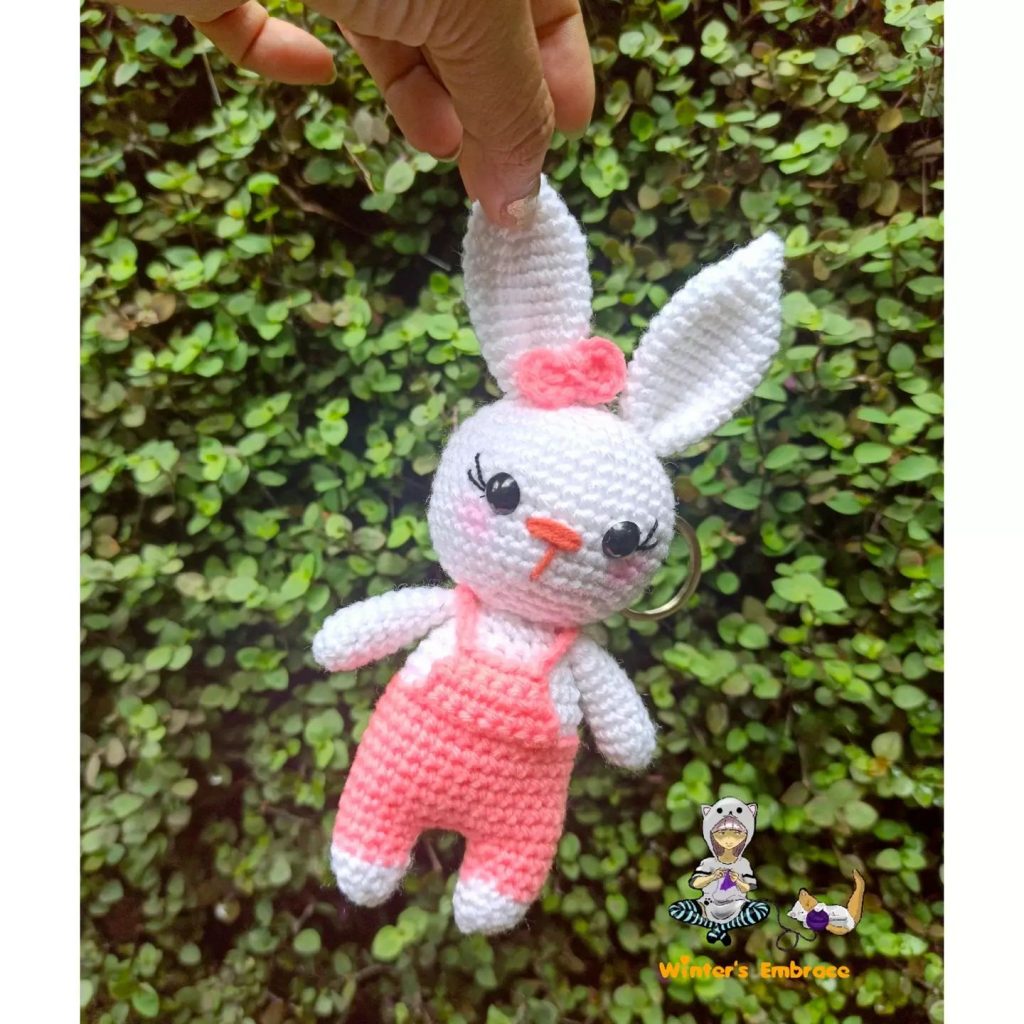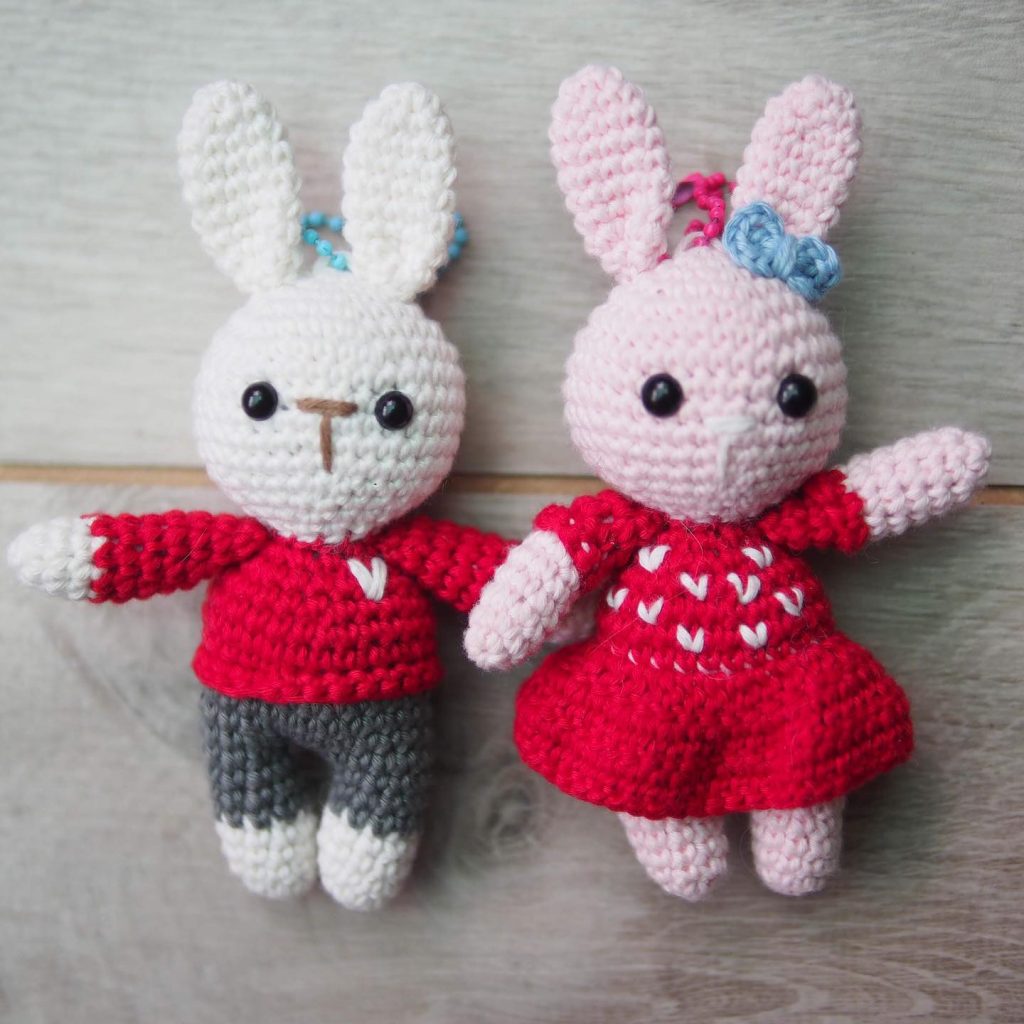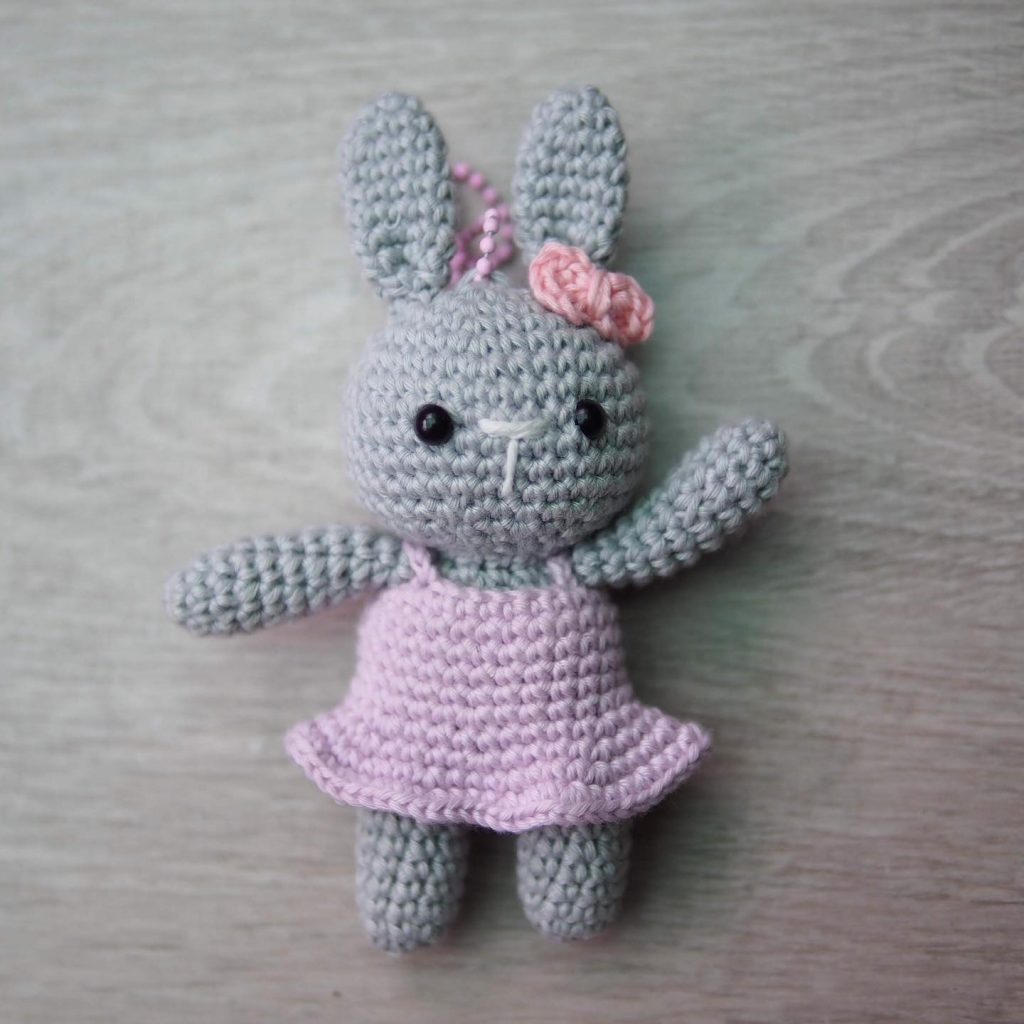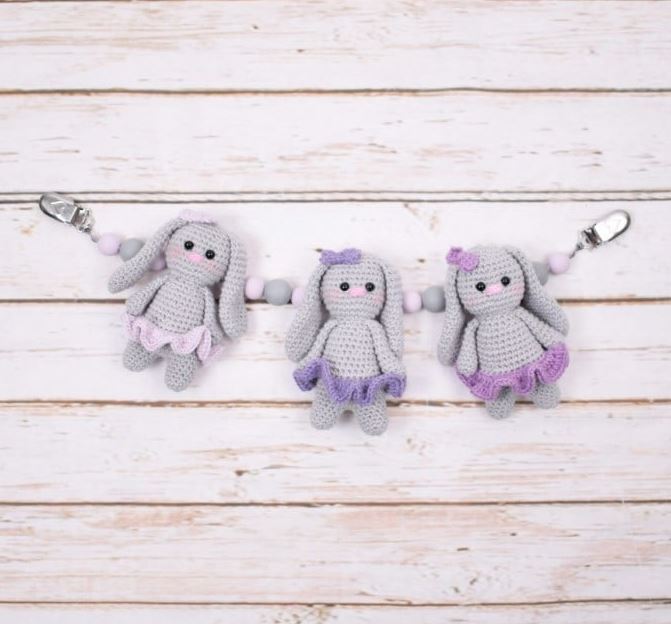
Baby Bunnies Amigurumi Keychain Free Pattern
Materials:
Rainbow 8/4
Crochet hook US size B/1 – C/2 (2,5 mm)
3 sets of Safety eyes 6 mm
2 suspender clips for string
Polyester string
4 silicone beads 18mm
8 silicone beads 15 mm
Fiber filling
Abbreviations:
St: Stitch
Sc: single crochet
Mr: Magic ring
Ch: Chain
Tog: Together
Blo: Back loop only
Sl st: Slip stitch
Hdc: Half double crochet
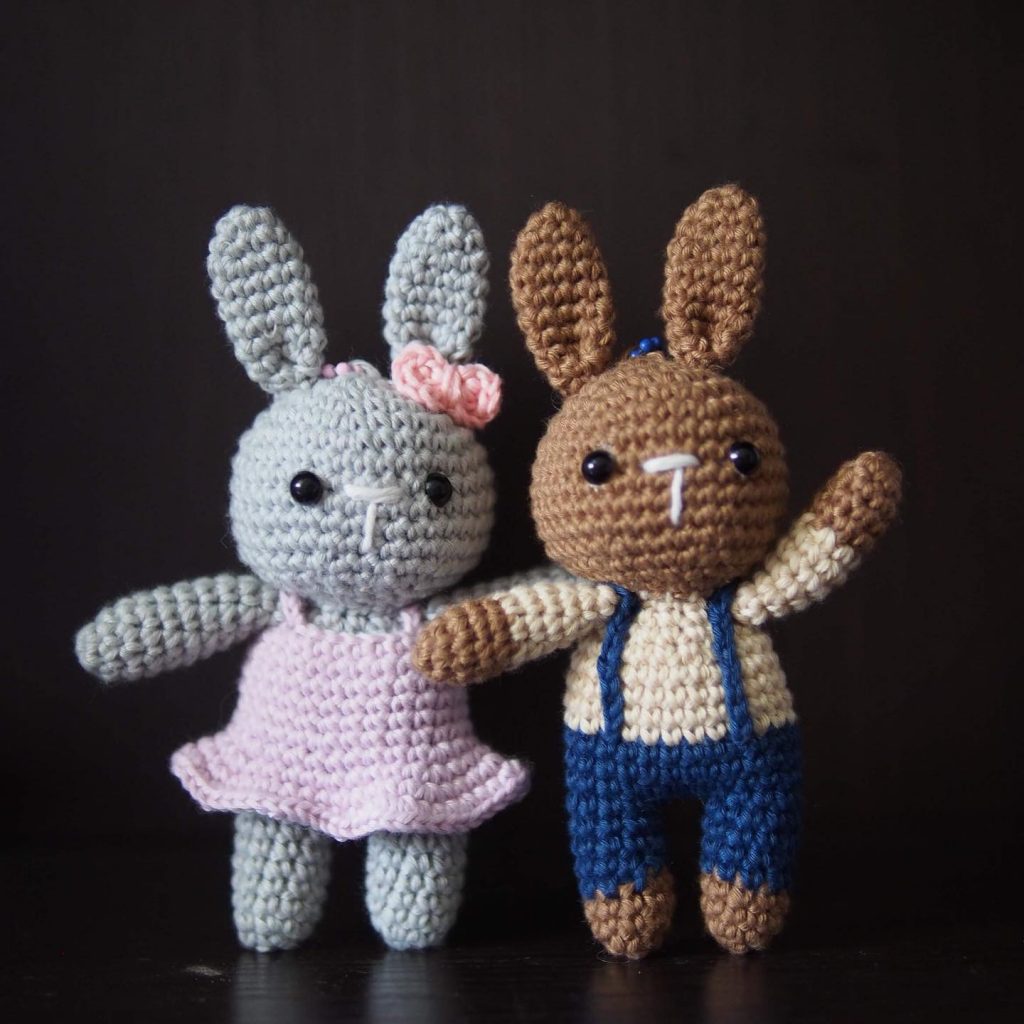
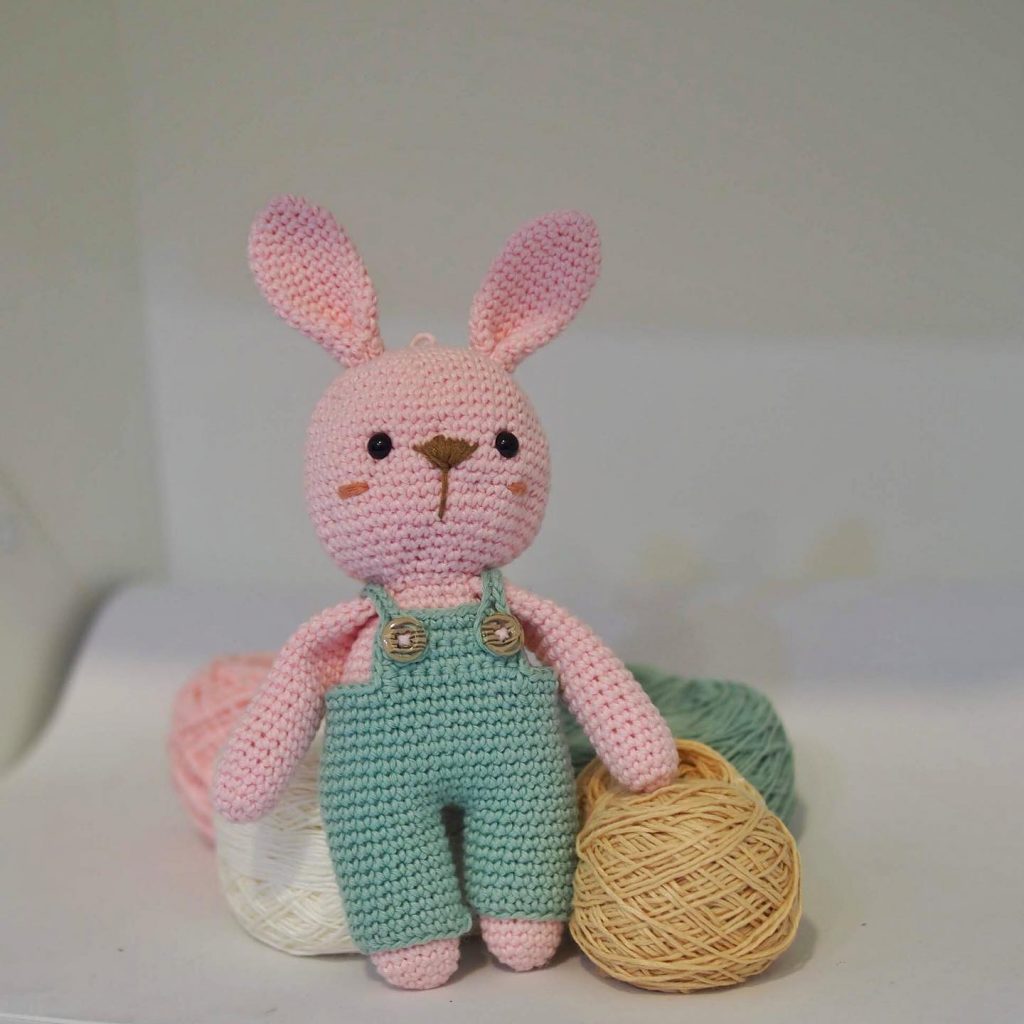
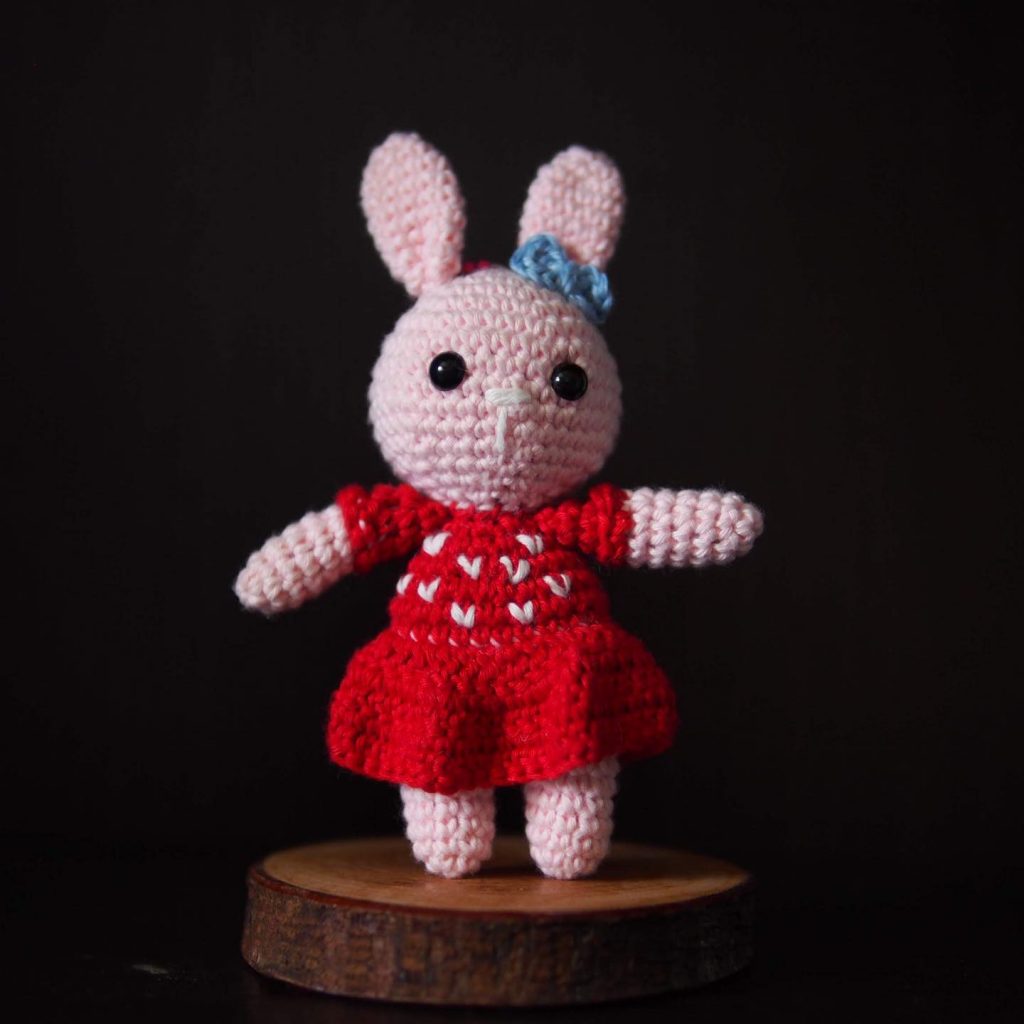
Legs: Make 2 with color A
Rnd 1. Make a mr and work 5 sc in the ring (5).
Rnd 2. Work 2 sc in every st around (10).
Rnd 3. Work ”1 sc in the first 4 st, 2 sc in next st”. Repeat ” to ” around (12).
Rnd 4. -7. Work sc around (12). Cut the yarn and weave in the end.
Make another leg but don’t cut the yarn on this one because you work on from here.
Body:
Rnd 1. Make 2 ch and now work 1 sc into the other leg and work sc in all st (12). Work 1 sc in the 2 ch and
thereafter sc around the first leg (12). Work 1 sc in the other side of the 2 ch (28).
Rnd 2. Work ”1 sc in the first 6 st, 2 sc in the next”. Repeat “to” around (32).
Rnd 3. Work sc in all st (32).
Rnd 4. Work sc in all st (32).
Rnd 5. Work sc in all st (32).
Rnd 6. Work ”1 sc in the first 14 st, 2 sc tog”. Repeat ”to” around (30).
Rnd 7. Work sc through blo around (30).
Rnd 8. Work ”1 sc in the first 8 st, 2 sc tog”. Repeat ”to” around (27).
Rnd 9. Work sc in all st (27).
Rnd 10. Work sc in all st (27).
Rnd 11. Work ”1 sc in the first 7 st, 2 sc tog”. Repeat ”to” around (24).
Rnd 12. Work sc in all st (24).
Rnd 13. Work sc in all st (24). Fill the legs and body with fiber filling.
Rnd 14. Work ”1 sc in the first 2 st, 2 sc tog”. Repeat ”to” around (18).
Rnd 15. Work sc in all st (18).
Rnd 16. Work ”1 sc in the first st, 2 sc tog”. Repeat “to“ around (12).
Fill the rest of the body with fiber filling. Now make the head.
The head:
Rnd 17. Work 2 sc in all st around (24).
Rnd 18. Work ”1 sc in the first 3 st, 2 sc in the next st”. Repeat ”to” around (30).
Rnd 19. Work ”1 sc in the first 4 st, 2 sc in the next st”. Repeat “to“ around (36).
Rnd 20. -24. Work sc all the way around (36).
Rnd 25. Work ”1 sc in the first 4 st, 2 sc tog”. Repeat ”to” around (30).
Rnd 26. Work sc around (30). Place the eyes between round 22 and 23 with 4-5 st between them.
Rnd 27. Work ”1 sc in the first 3 st, 2 sc tog”. Repeat ”to” around (24).
Rnd 28. Work ”1 sc in the first 2 st, 2 sc tog”. Repeat ”to” around (18). Completely fill up the head with
fiber filling.
Rnd 29. Work ”1 sc in the first st, 2 sc tog”. Repeat ”to” around (12).
Rnd 30. Work 2 sc tog around (6). Sew up the hole and weave in the end.
Dents and snout:
Rnd 1. With the same color as the head, pull a strand of yarn up and out on the right side of one eye.
Rnd 2. Put the needle down on the left side of the eye and tighten a bit.
Rnd 3. Tighten a bit so there’s a dent under the eye.
Rnd 4. Now pull the strand of yarn up on the right side of the other eye.
Rnd 5. And down again on the left side of the eye.
Rnd 6. Tighten a bit so the eyes are pulled slightly back and gives the bunny a cute expression.
Rnd 7. Sew the snout as on the picture above. It is sewn over 2-3 st.
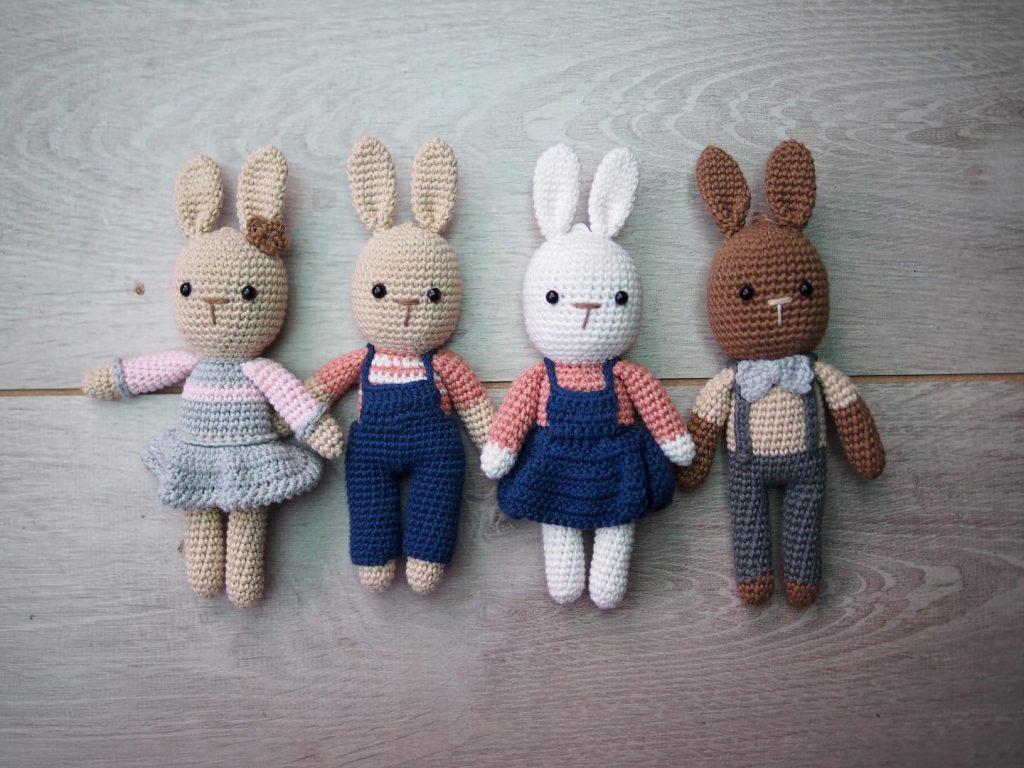
Skirt: In color B
Rnd 1. Turn the bunny so that the head is facing you. Insert the yarn in a chain on the body where there
was worked in blo. Work 1 sc in all chains all the way around and finish with 1 sl st (30).
Rnd 2. Work 1 ch, 2 hdc in all st around. Finish with 1 sl st in the first hdc (60).
Rnd 3. Work 1 ch, 2 hdc in all st around. Finish with 1 sl st in the first hdc (120).
Cut the yarn and weave in ends.
- Turn the bunny so that the head is facing you.
- Insert the yarn in a chain on the body where
there was worked in blo. - Work sc around and finish with 1 sl st.
- Work 1 ch, 2 hdc in all st around. Finish with 1 sl st in the first hdc.
- Work 1 ch, 2 hdc in all st around. Finish with 1 sl st in the first hdc.
- There. Cut the yarn and weave in ends.
Arms: Make 2 with color A
Rnd 1. Make a mr and work 5 sc in the ring (5).
Rnd 2. Work 2 sc in all st around (10).
Rnd 3. Work sc around (10).
Rnd 4. Work sc around (10).
Rnd 5. Work ”1 sc in the first 3 st, 2 sc tog”. Repeat ”to” around (8).
Rnd 6. – 11. Work sc around (8).
Put a little fiber filling in the hand and arm. Fold the arm flat and crochet tog with sc. Leave a long
string for sewing.
Now sew on the arms right below the head. Cut the yarn and weave in ends.
Ears: Make 2 with color A
Rnd 1. Make a mr and work 5 sc in the ring (5).
Rnd 2. Work 2 sc in each st around (10).
Rnd 3. Work 1 sc in each st around (10).
Rnd 4. Work ”1 sc in the first st, 2 sc in the next st”. Repeat “to” around (15).
Rnd 5. Work 1 sc in each st around (15).
Rnd 6. Work ”1 sc in the first 4 st, 2 sc in the next st”. Repeat “to” around (18).
Rnd 7. Work sc around (18).
Rnd 8. Work ”1 sc in the first 7 st, 2 sc tog”. Repeat ”to” around (16).
Rnd 9. Work sc around (16).
Rnd 10. Work ”1 sc in the first 6 st, 2 sc tog”. Repeat ”to” around (14).
Rnd 11. Work sc around (14).
Rnd 12. Work ”1 sc in the first 5 st, 2 sc tog”. Repeat ”to” around (12).
Rnd 13. Work sc around (12).
Rnd 14. Work ”1 sc in the first 4 st, 2 sc tog”. Repeat ”to” around (10).
Rnd 15. -21. Work sc around (10).
Fold the ear flat and crochet tog with sc. Leave a long string for sewing. Now attach the ears on each side of the head.
Bow: With color B
Rnd 1. Cast on 7 ch. Work 1 sc in 2nd ch from the hook. Sc for the rest of the row (6).
Rnd 2. Turn with 1 ch. Sc for the rest of the row (6).
Rnd 3. Turn with 1 ch. Sc for the rest of the row (6). Cut the yarn and weave in the end.
Wind a piece of string around the middle so the piece gets the shape of a bow. Attach the bow at one of the ears on the bunny.
Make 3 bunnies with each of their own color skirt and bow
Assembling:
– Now assemble the chain. Cut approx. 27.5 inches (70 cm) of polyester string. Make a loop around the
hole in the clip approx. 4 inches (10 cm) from the end. Hide the end under the first 3 beads (1 small, 1
large, 1 small). Tie a knot after the 3rd bead.
– Pull the string through the back side of the head. Tie a knot and place 3 beads (1 small, 1 large, 1
small). Tie a knot after the 3 beads.
– Repeat this until all the bunnies are attached. Finish with 3 beads. Make a loop around the hole on the
other clip and pull the end through the last 3 beads so it is hidden.
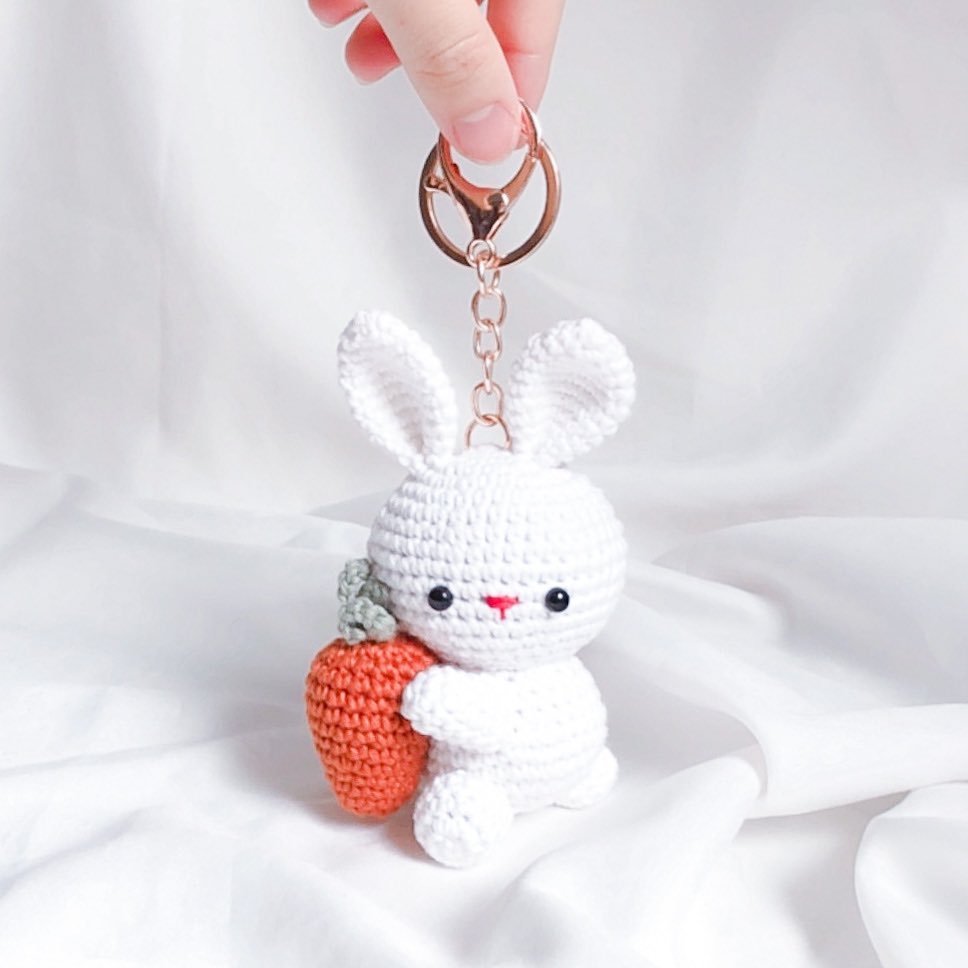
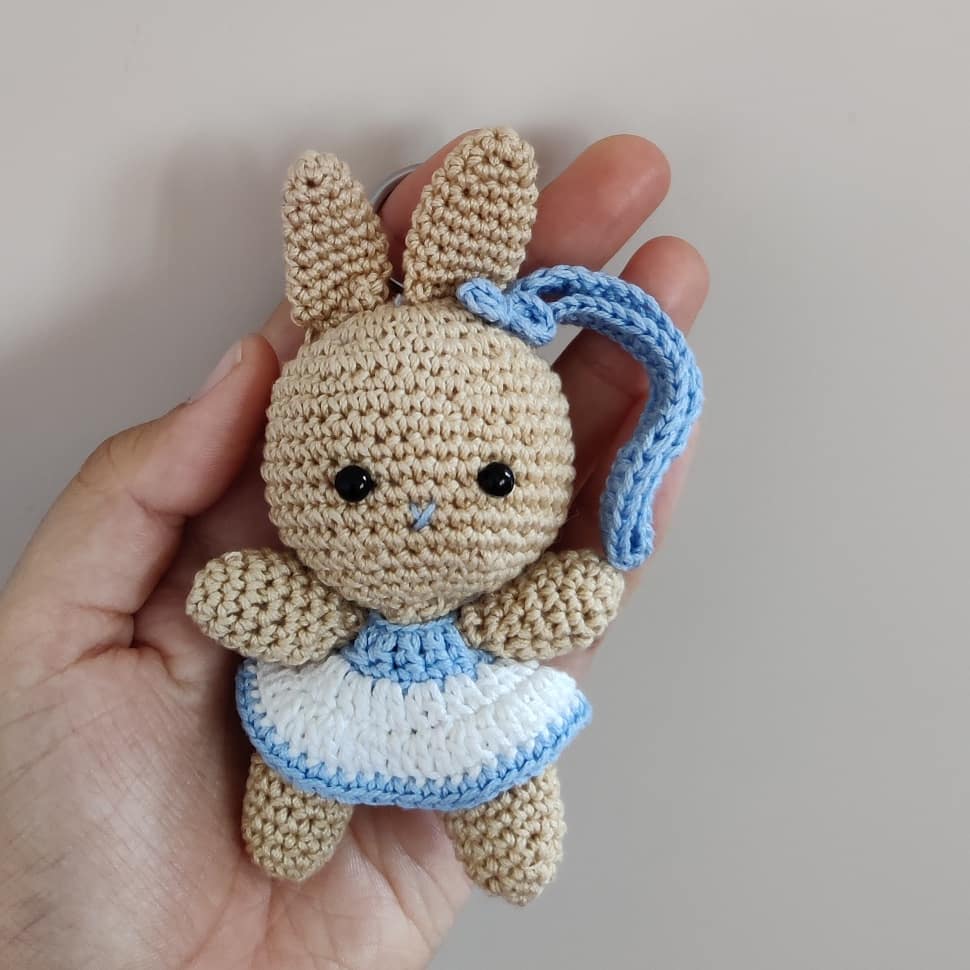
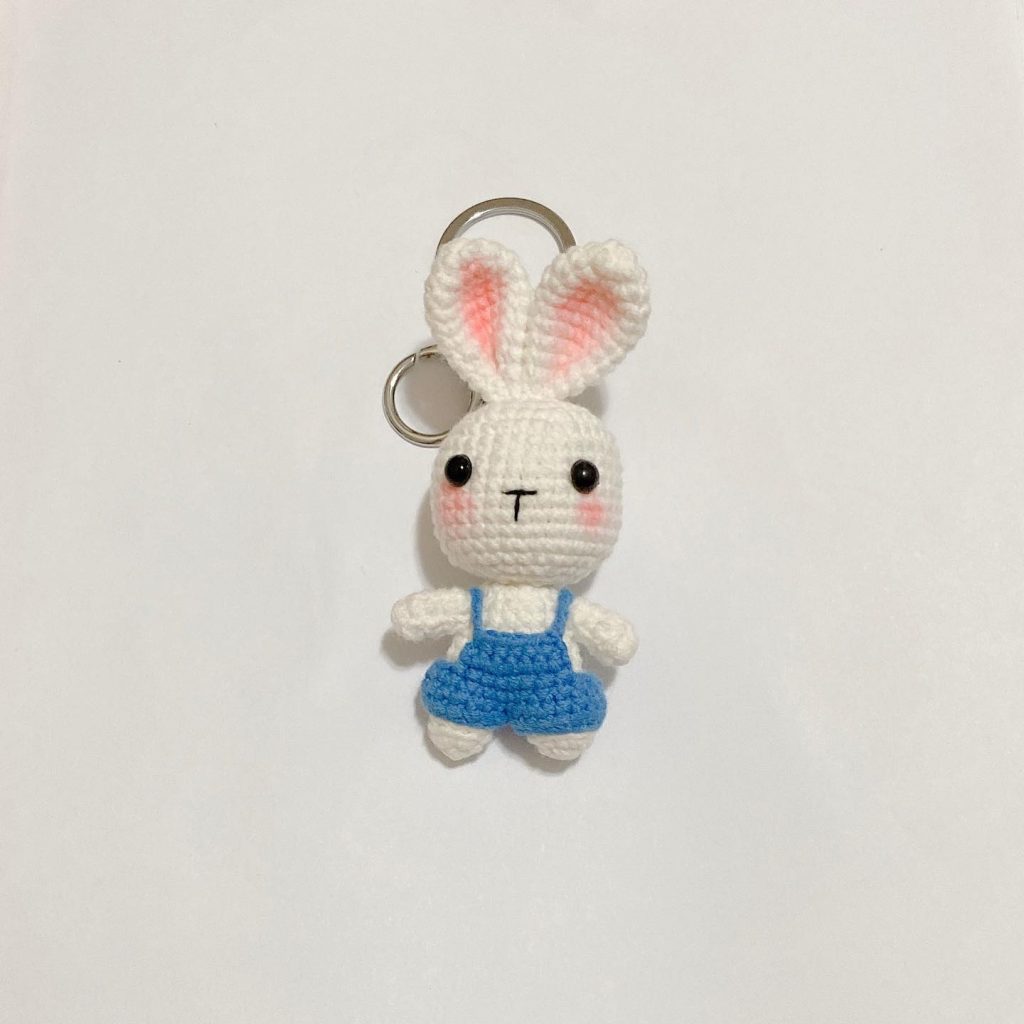
More Amigurumi Bunny İdeas